Canon EOS-R mirrorless camera: drop-in filter adaptor & infrared photography

Years ago I used to dabble in infrared photography, using Kodak false colour ektachrome film.

Having recently bought a model R full frame mirrorless camera, the temptation to go infrared started to niggle…

Available for the R is an adaptor that allows use of the full range of full-frame EOS lenses - in fact 2 versions of the adaptor, a plain one, and one with a drop-in filter holder. And it is the latter that aroused my attention, first of all buying it with a polariser, the behind-the-lens position meaning that a single polariser could be used for any lens, long telephoto to the widest angle - and with the added
benefit that rotating the polariser is a fingertip operation without moving a hand away from the camera body: so delightfully easy compared to trying to rotate one deep within a lens hood!

The adaptor with polariser is expensive compared to even the best of standard polariser - until you want to use with multiple lenses, not needing multiple polarisers if you have lenses with different size mounts, and even usable with wideangle lenses without a filter mount ring.

What then struck me was that the drop-in filter adapter could be used for infrared filters, again allowing swapping lenses without needing multiple filters, so the idea of having the camera converted to be IR capable was born.

And so I did it. My R is now full spectrum, from infrared through ultraviolet. I presently have the following drop-in filters:

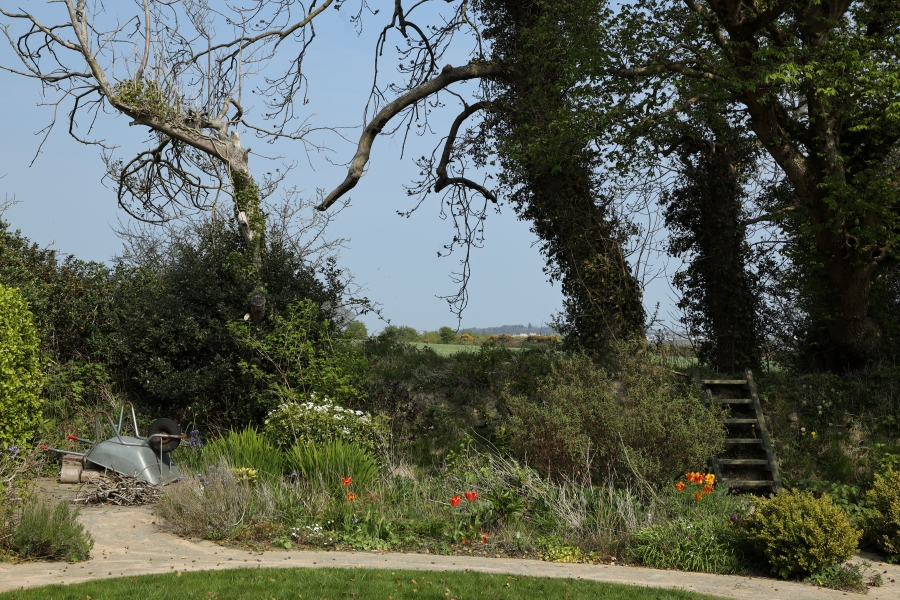
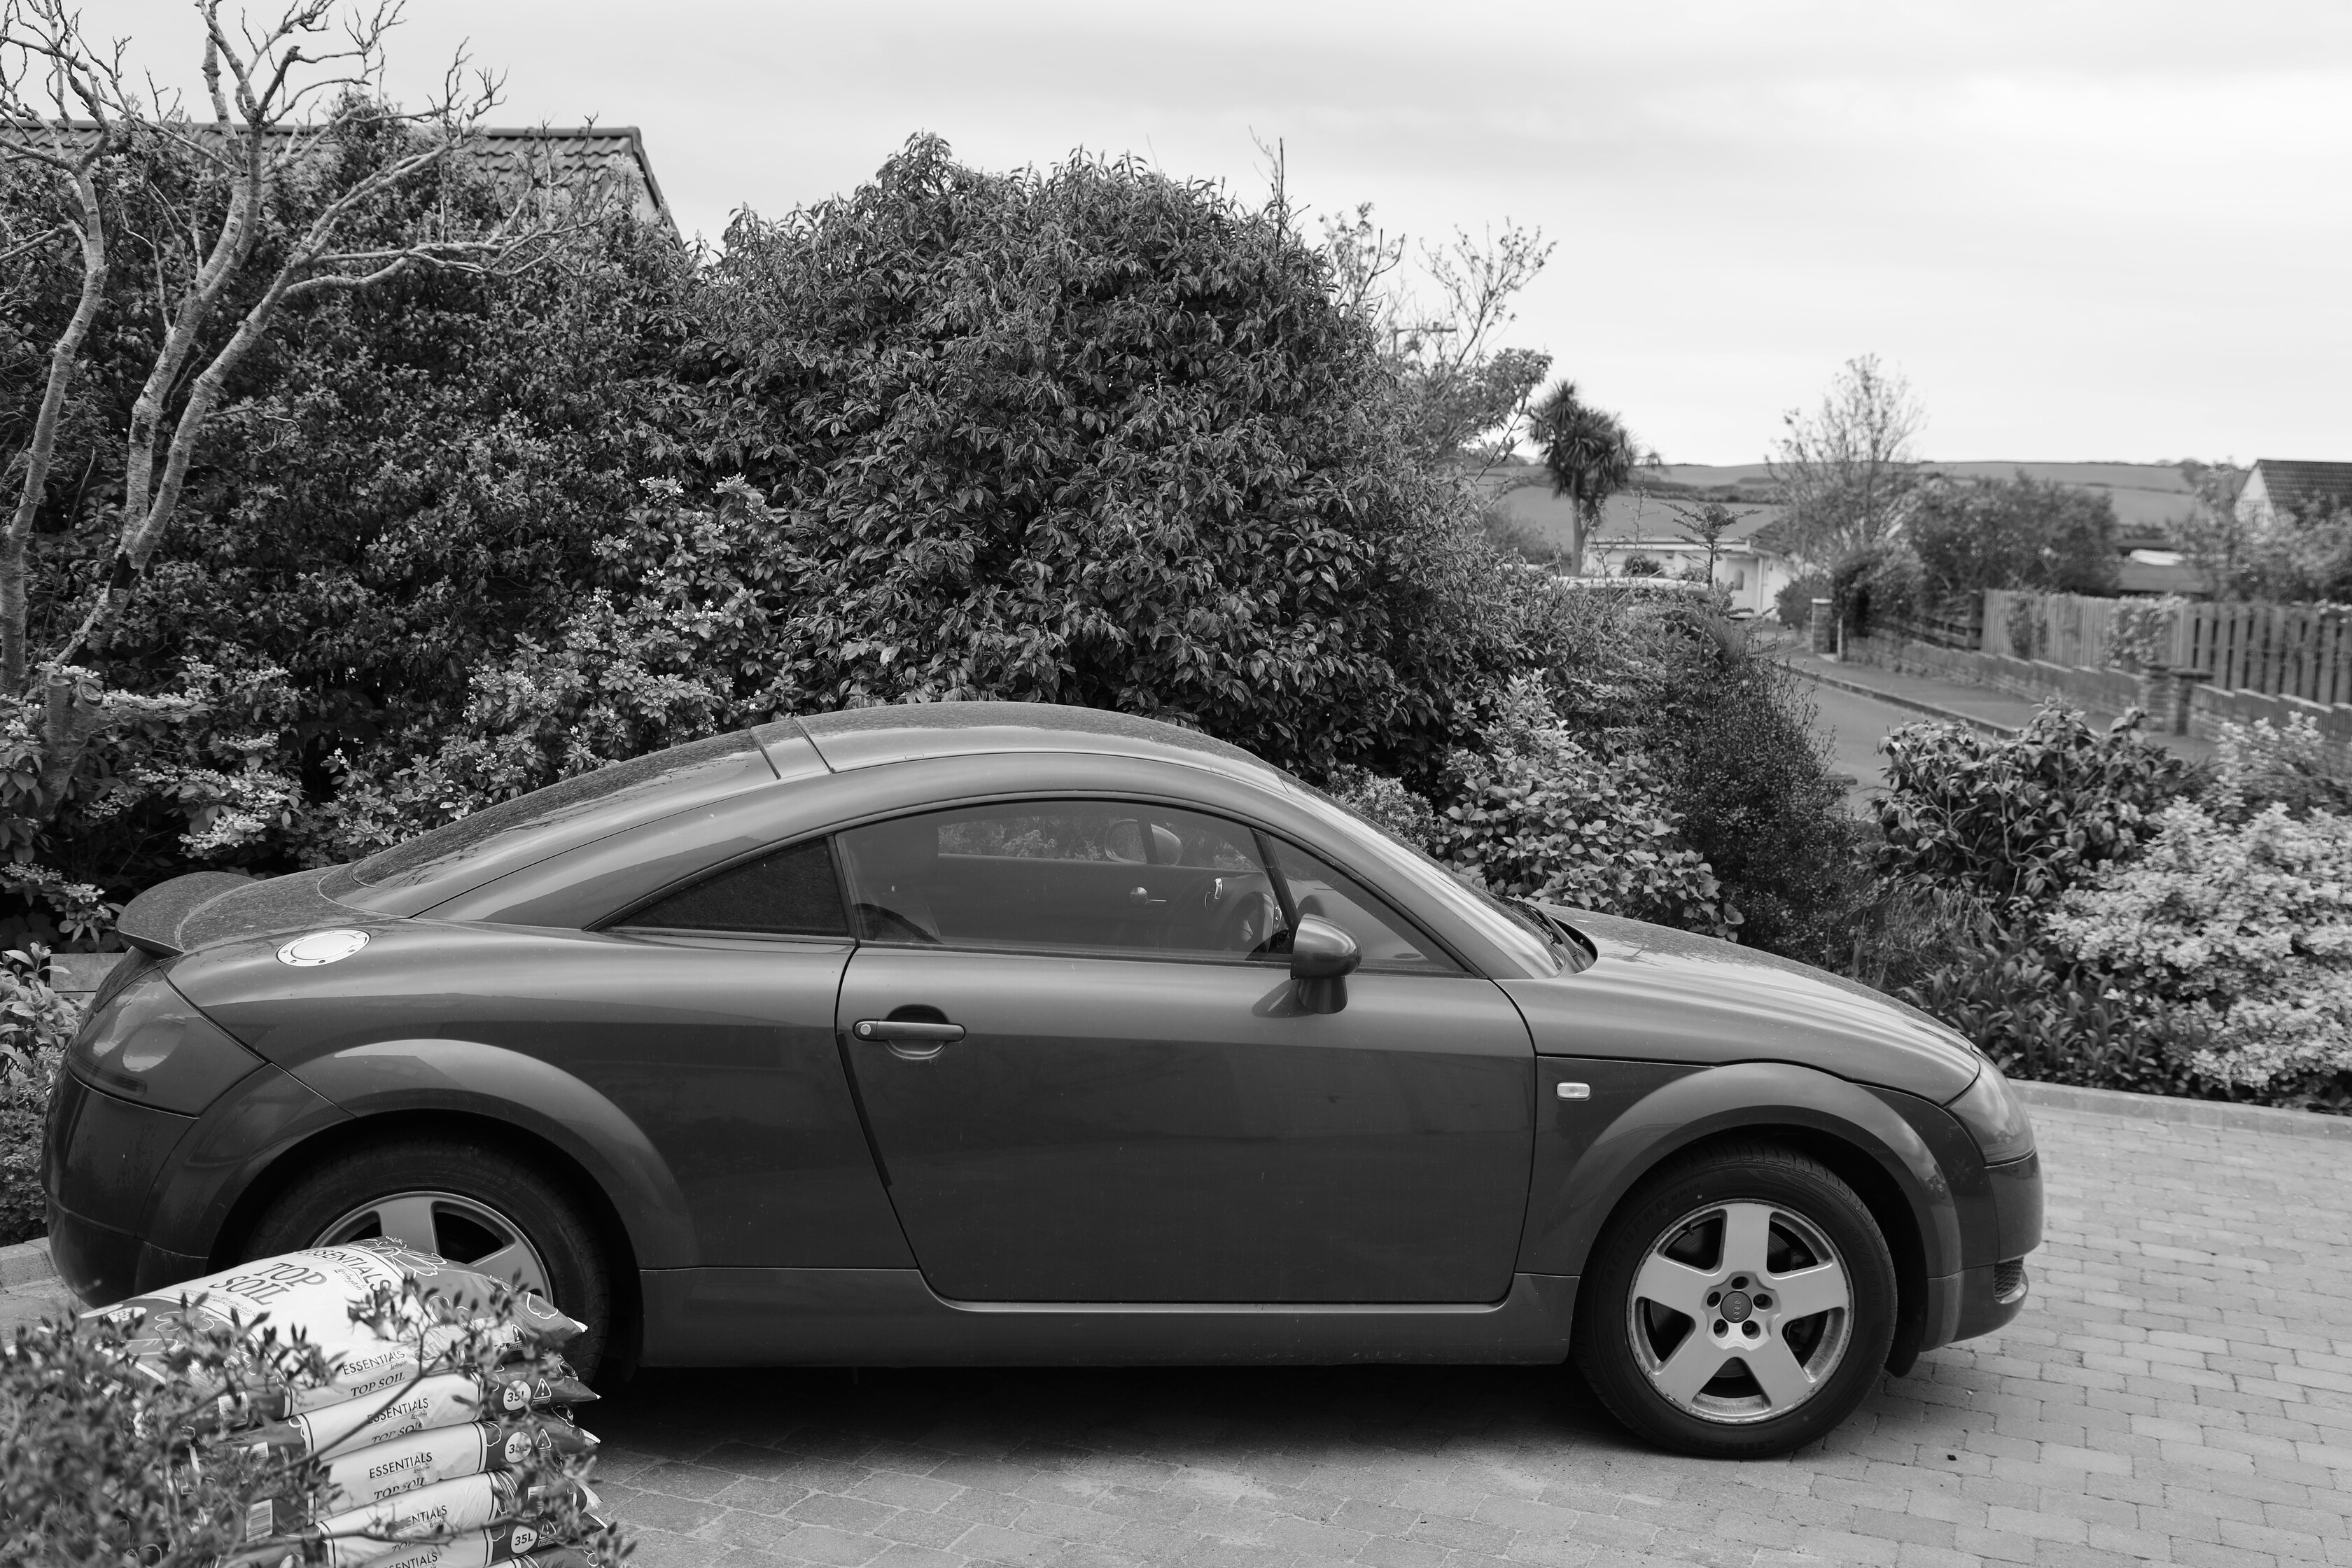
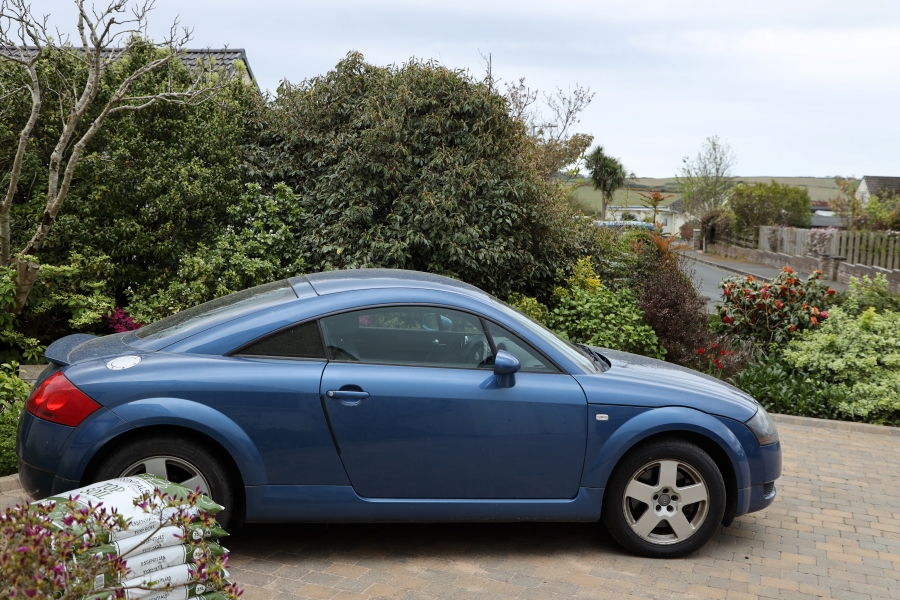
  • Visible-only spectrum to allow normal use.

  • Same combined with polariser.

  • IR+blue filter which gives interesting, pleasing, images straight out of the camera just setting a custom WB. (Incidentally also used in crop analysis work, though I don’t do that)

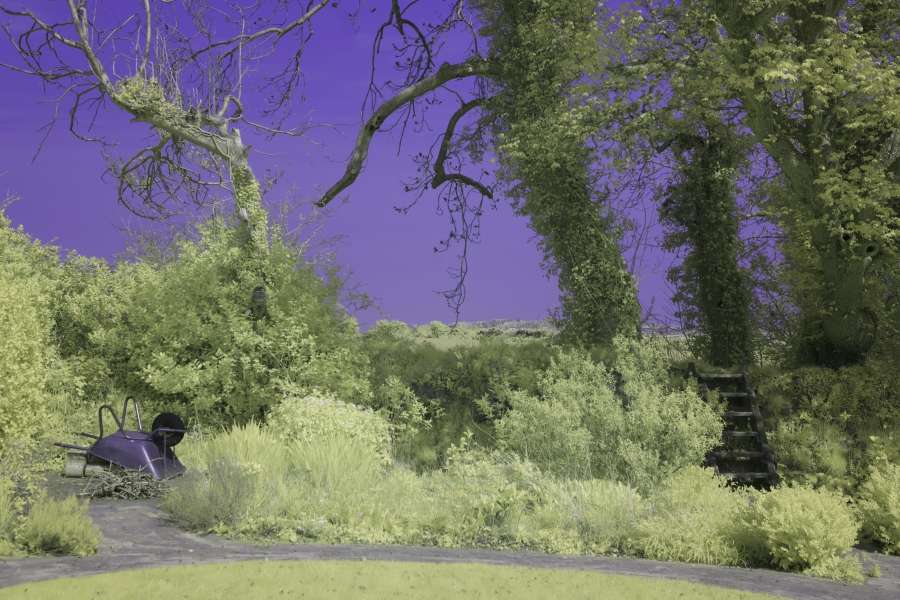
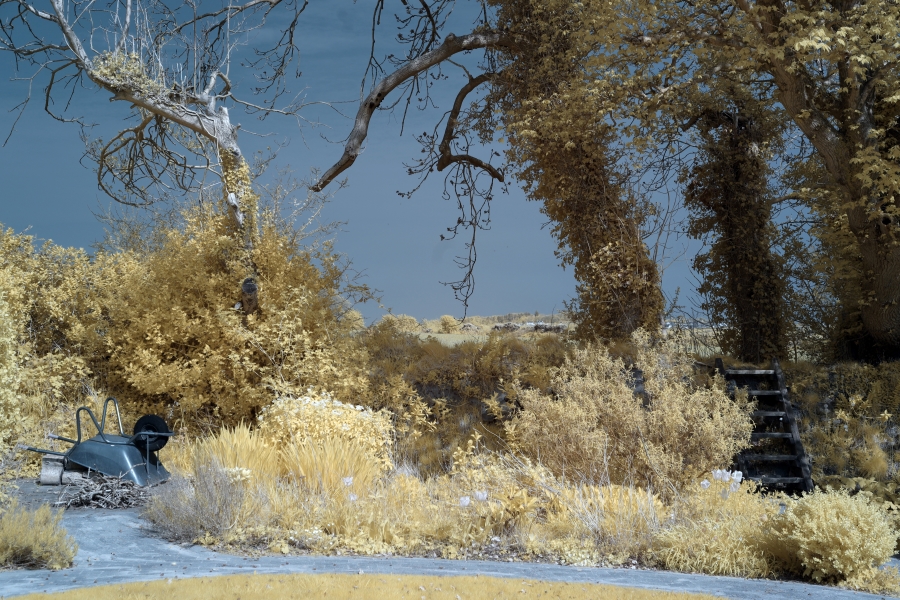
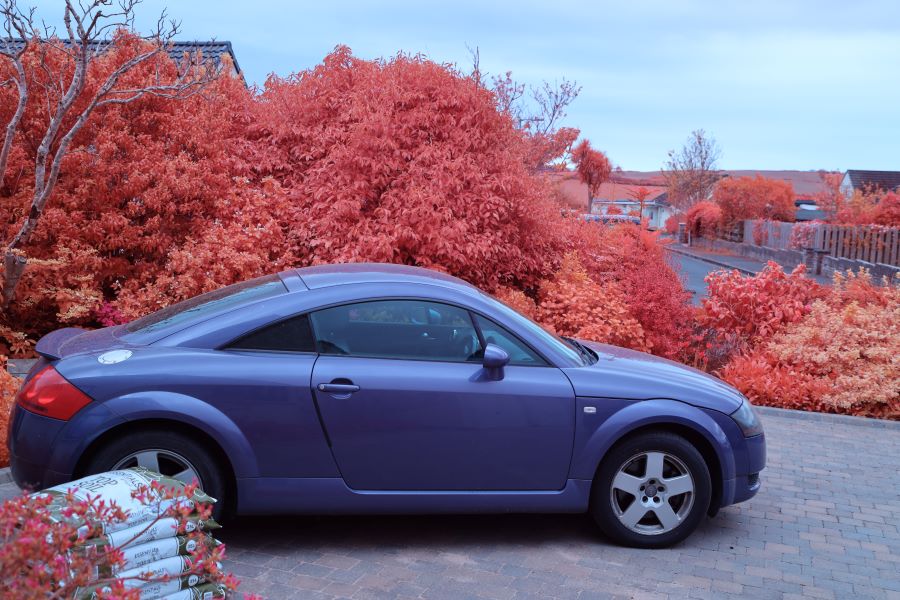
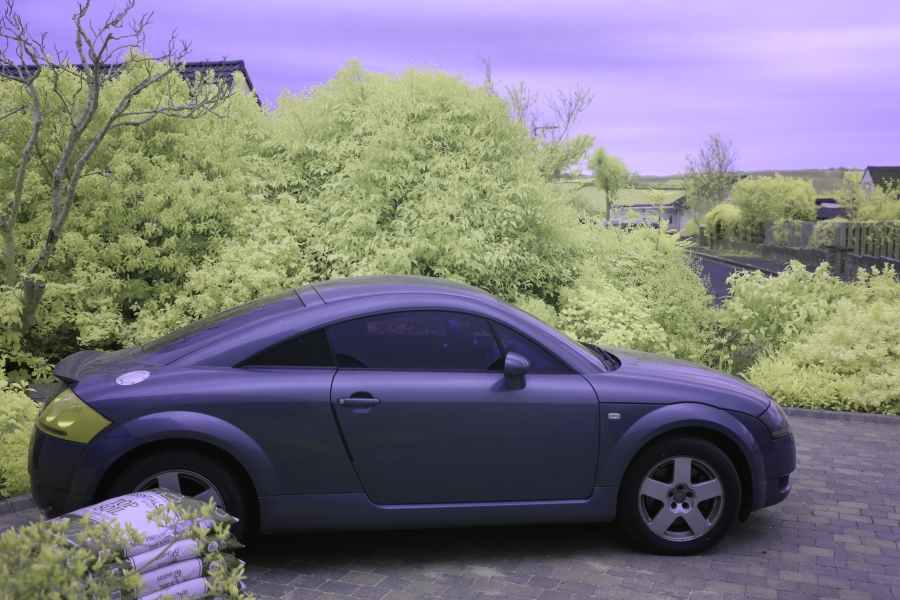
  • Proprietary filter fairly closely mimicking Ektachrome false-colour IR effect straight out of the camera (again just setting a custom WB).

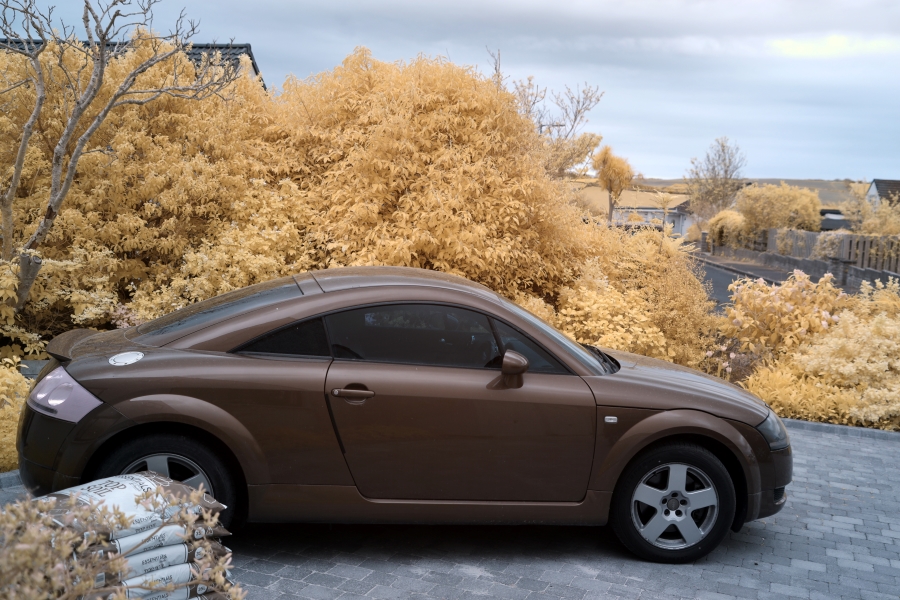
  • 590nm filter, removing shorter wavelengths and requiring post-processing (e.g colour channel swapping) to give fantastical images.

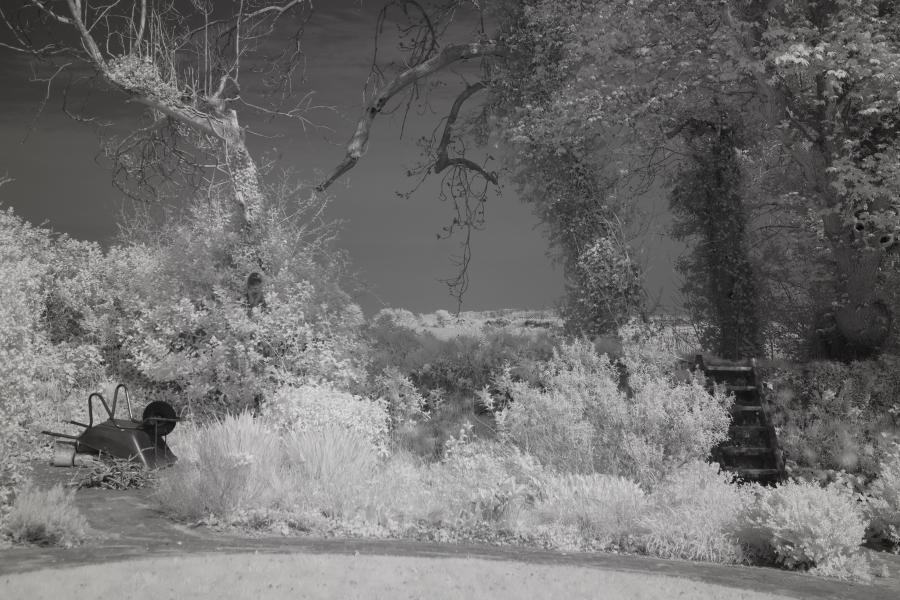
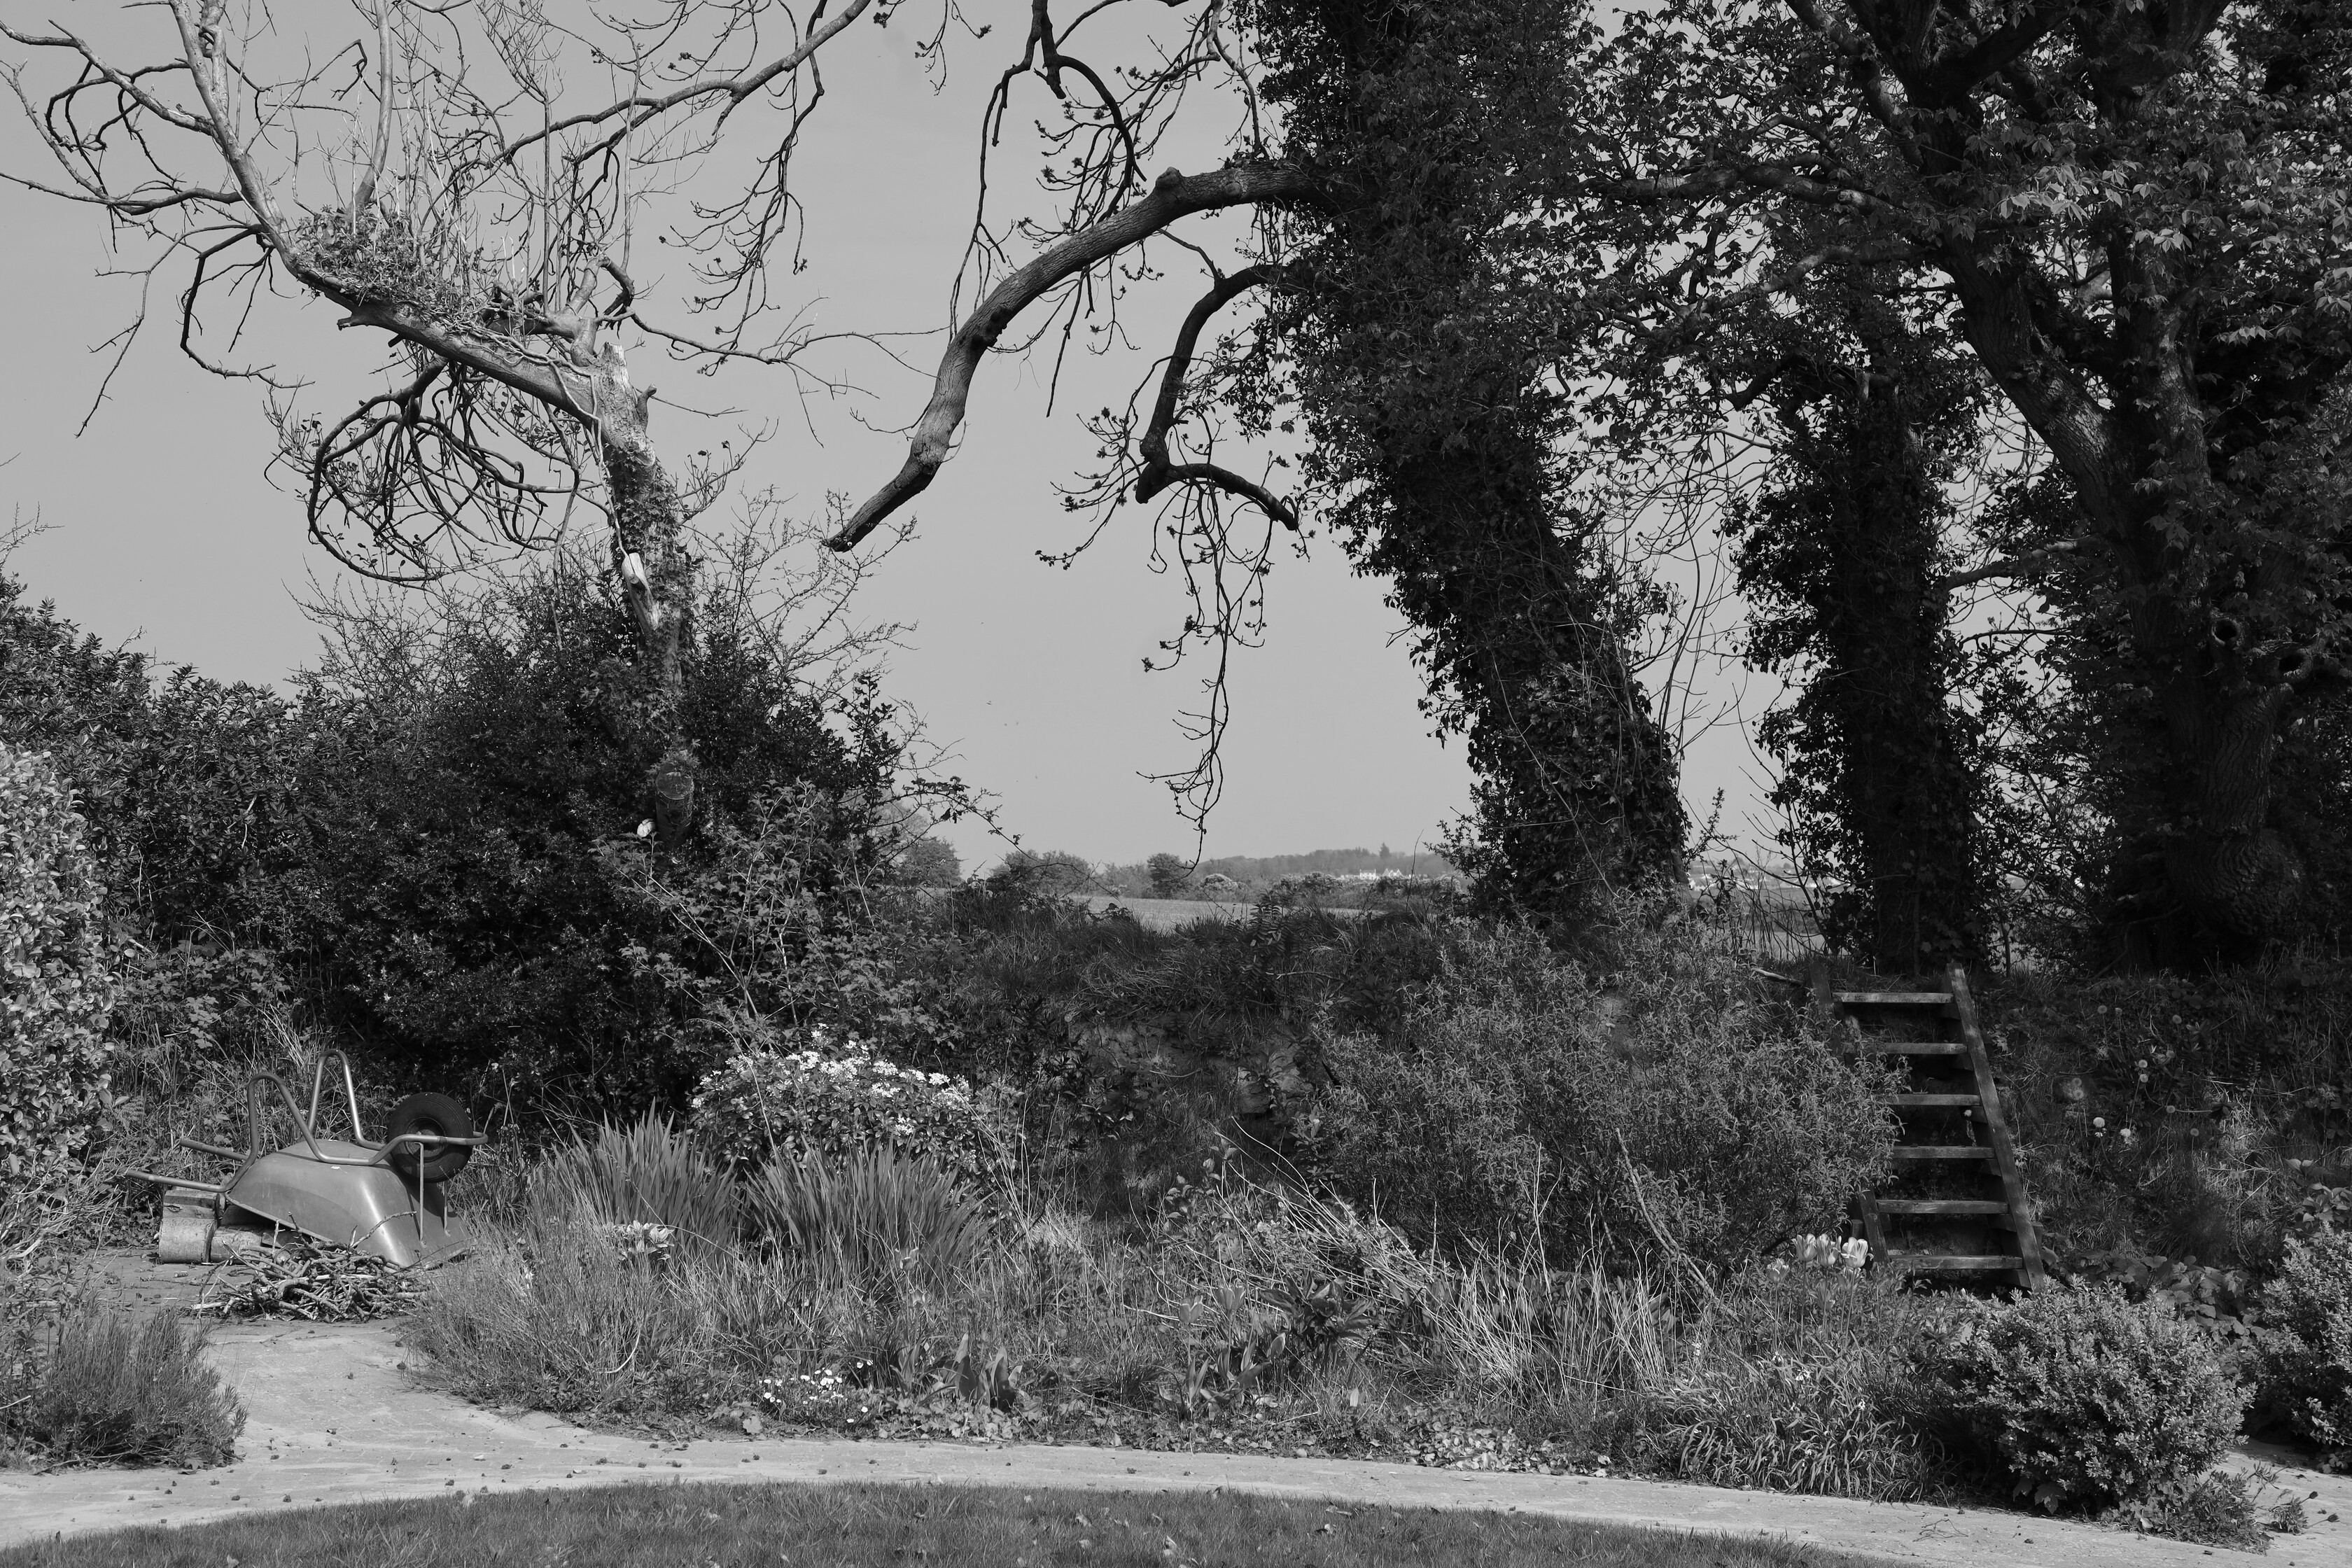
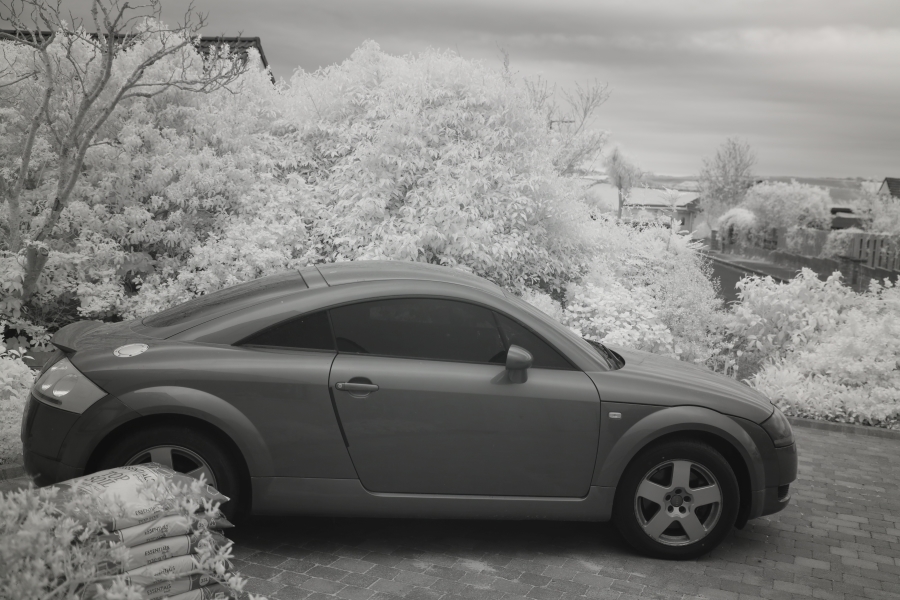
  • 850nm IR only filter giving monochrome images in a spectral area the human eye can’t see. (And I’ve made a simple flashgun adaptor to also be only >890nm for invisible night photography, though not sure what use I have for it yet!)

I had the camera modified by Kolarivision, from where I also bought the filters (and their website here [link] shows the effects all the above can produce). I chose them out of apparently 3 key players having explored details with the three (one other was my initial preferred choice for the conversion, but there seemed to be a communication difficulty or unwillingness that sowed a seed of doubt as to wisdom of proceeding).

With regard to image appearance, for anyone unaware, a significant factor in infrared landscape photography is that green foliage reflects strongly in the infrared, so as IR is recorded simply as part of red, leaves appear red instead of green (or depending on the filter characteristics added to the green appearing yellow), or in monochrome appear light instead of dark.

The one difficulty I had to overcome before going ahead was that For the R adaptor Canon only make 3 drop-in filters, and no bare holder, so I had to use the ridiculously expensive clear drop-in filter, and not being demountable I had to verify that I could remove the clear filter and be able to fit available IR filters. Once that was achieved I went ahead. I can of course provide details if anyone is interested in doing likewise - though it would be nice if Canon were to make a demountable holder to save the hassle.

Other than test it I haven’t used the capabilities for real yet, this just opening the door for me to get back to playing, which I look forward to doing in time…

2 Likes

Look forward to some results, sounds great :slightly_smiling_face:. (I have an R myself)

Yeah I think the R was so far an underrated camera, while after firmware changes, the sentiments dramatically changed. I am still with the 5D mark 2, but will most probably make the switch to the R5 on arrival.
While I wouldn’t like you be interested in infrared…

Assuming you retain your existing EOS lenses using an adaptor, if you use polarisers you might find the version with drop-in polariser interesting. But be aware it is more expensive even than it appears, at least in Uk market, because although it is sold with polariser you need to buy the marching clear drop-in filter for when you don’t want the polariser. I think price-wise it is a rip-off, though presumably a third party supplier will identify that as a market once popularity of the RF fitting justifies.

The disadvantage of using EOS fit lenses and adaptor is that you lose the greater compactness that the slim pure RF fit enables.

A ‘normal’ silicon photogate sensor shouldn’t be able to respond to ultraviolet, the minimum wavelength is typically ~420nm (very occasionally one can be found with a small degree of response 400nm - 350nm, but this compromises well depth and response > 700nm). Even in my work with optical instruments, I never actually encountered a 2d photogate array with significant response below 400nm (it requires a specialist doping of the silicon), I know they do exist for specialist areas like astrophotography and some other scientific uses, but it would be very odd to find one in a conventional camera.

Some silicon photodiodes on the other hand can have response down to 180nm (again with specialist doping and design of the depletion layer), but these aren’t suitable for use as a high resolution camera sensor.

I would also start shifting to RF then, as those ones are of great quality, at least according to tests.

Will be taking my R to photography show simply to try a couple of rf lenses as right now I only use ef fit on mine.
The R5 looks like it should impress🙂 and may lead to a kit dilemma…

1 Like

I haven’t attempted to measure the spectral response of the sensor, however as the ‘hotmirror’ visible range filter from Kolarivision (red in chart below) has a UV response extending further than the Canon original hotmirror (one of the blue lines cutting off a bit above 400nm in this chart below).

I therefore sandwiched a UV filter (Gobe 3 peak) with the hotmirror when I was making up the drop-in. However, photos compared to prior to conversion had more blue content, and so I measured the response of the sandwich and found it had quite an extended UV response, over 50% transmission at 375nm and still 16% at 350. I changed the Gobe for a Hoya Fusion Antistatic UV filter which had the sharpest UV cutoff of any that I could find with published curves, with a resultant image colour balance very similar to the original camera image. Measuring the new sandwich showed it cut sharply below 420nm with only just over 1% transmission at 400nm. So the camera sensor with its own hot mirror removed certainly has significant sensitivity below 400nm.

That’s Interesting: that will compromise the depth of the charge well in the photogate which will in turn compromise the noise performance at low ISO equivalent numbers, but, on the other hand, may give a bit better performance at high ISO numbers. Interesting way to arrange the engineering compromises of the sensor, to gain a more consistent noise performance (not so great an increase of noise at higher speeds) at the expense of limiting the absolute best performance possible from the sensor.

I’ve just remembered, Canon are odd in that they use a custom made sensor, made solely for them, rather than using an 'off the shelf sensor such as those from the Sony Exmoor range and a few other manufacturers. Presumably they are specifying a consumer quality (read: not so expensive!) version of one of the back thinned ‘scientific’ (read: very expensive!) sensors.

This topic was automatically closed 60 days after the last reply. New replies are no longer allowed.

OK, some time has passed, and a few photos taken – unfortunately I’ve been extremely busy, so not had time for many, and with lockdown I haven’t been able to go out seeking locations so these all in my garden.

The only in-camera manipulation has been white balance: AWB=camera’s auto white balance so exactly like common normal use of the camera. GreyWB – a shot of a grey card taken through the filter used to set custom white balance. For simplicity, other than white balance I kept the camera on auto everything. People also use other white balances, most notably grass shot through the relevant filter, but for simplicity I haven’t included any here.

Filters:

Normal = Kolarivision’s Hot Mirror sandwiched with a Hoya Fusion UV filter

IR Chrome = Kolarivision’s proprietary filter designed to emulate the old Ektachrome false colour IR straight out of the camera.

Blue-IR = Kolarivision’s filter of that name, also known as an NVDI filter.

590 = Filter cutting light above 590nm.

850 = Filter cutting all visible light, images with infrared light invisible to human eye. Monochrome only the red colour needing converting to black.

For anyone unaware, one characteristic of green vegetation is that it strongly reflects infrared light, appearing red in ‘straight’ full spectrum photos, and white in ‘straight’ monochrome

In the pics that follow, this and the two posts immediately after, to show the reality of the process rather than the potential that can be achieved, I have done no post-shot manipulation at all other than as stated in the headings (red-blue channel swap in two 590nm shots, and desaturation to monochrome for two normal shots to make B&W for comparison with the monochrome infrared shots).

IR-Chrome/AWB:

Blue-IR/GreyWB:

590/GreyWB with Red - Blue channels swapped:

Normal/AWB:

And some more, simply following on but keeping posts to manageable size:

850/GreyWB:

Normal/AWB desaturated to monochrome:

850/GreyWB:

Normal/AWB desaturated to monochrome:

And one more batch:

IR-Chrome/AWB

Blue-IR/GreyWB:

590/GreyWB:

590/GreyWB Red-Blue channels swapped:

Normal/AWB:

1 Like

Cool, I’ve converted a couple of cameras myself by swapping out the filters in each.

Trouble is of course they’re then fixed at the selected frequencies, hence the reason why I chose different filters for each conversion. This option is much more flexible :slightly_smiling_face:

I’m new to this forum (or really any forum, for that matter) so I thank everyone for their efforts to re-open this topic. I currently have an EOS R on its way to Lifepixel for a conversion Full Spectrum, and I was very interested to read that you found a way to use the EOS R’s drop-in filters as a means to harness the various light spectrums instead of using screw-on filters at the end of the lens. I have a Canon EF 11-24 that doesn’t allow for use of external filters, so the drop-in solution using the EOS R’s EF adapter is ideal.

If you could provide me some direction on what is involved to modify the EOS R’s EF drop-in filters I would be very grateful. Thank you very much for any help you can provide.

OK, here is info on creating drop-in filters for IR from Canon’s drop in holder for the R’s EF adapter. But before proceeding, be aware that Spencers Cameras, one of the three main places doing conversions, now offer filters already fitted to drop-in mounts. They weren’t available when I did mine. The price is higher than modifying Canon’s drop-in despite the ridiculous price of the drop-in that forms the basis for the latter - and options don’t include everything, but obviously less work.*

Canon’s drop-ins for this adapter are available presently only as polariser, ND and a clear glass (called Clear Filter A), the latter being what I used. If only the Canon filter holder had a screw-in filter! But it doesn’t. I found that the filter glass is held in place by the plastic being moulded over the edge, and with careful use of a scalpel I was able to trim back to release the filter, finding it to be 46mm diameter, the standard glass size in 49mm screw-on filters, so that is the size I bought.

It was a simple matter to pop the filters in the holders, but I needed to fix more securely. I used Geocel Works Multi-use sealant and adhesive, a non-silicone product, loading some into a small syringe with a tip that I cut to about 1mm. I ran a bead of the adhesive around the periphery of the filter, and used a narrow screwdriver blade to tool the adhesive to be sure it made contact with the plastic of the holder, and just overlapping the very edge of the filter, but not proud of the outer periphery.

I found that on one filter where I managed to get a smear of the glue, gentle rubbing with a microfibre cloth moistened with IPA, finishing with a fresh moistened part and finally just the cloth removeD it successfully.

I labelled the holders with white rub-on lettering, and sprayed over with clear lacquer to make wear resistant after masking the rest of the holder (done before fitting the filters).

That basically is it, however I did more:

From info provided by Kolarivision, from where I sourced the Hot Mirror UV/IR cut filter for normal use, I was concerned that the it would let more UV through than the original Canon Hot mirror. It seems that is common to other brands as well, and although perfectly usable with auto white balance the colours would not quite match original and they recommended setting a custom WB. To avoid that I sandwiched a UV filter with it.

I did quite a bit of research, initially drawn to the Gobe UV 3 peak filter, which was perfect in terms of thickness (~1mm), but its UV cutoff wasn’t adequate, and I settled on the Hoya Fusion UV which had the best of any I could identify. Available only mounted, it turned out not to be demountable! However by cutting with a fine hacksaw carefully almost to the glass at two diametrically opposite points, then using a small screwdriver in the resultant slot to snap the metal at one of the points, I was able to remove the filter.

The Hoya glass is 2mm thick, making the sandwich uncomfortably close to the available depth (and this will depend on the thickness of the Hot Mirror filter), so I used a scalpel blade to scrape maybe about 0.1mm or so from the mount to ensure it wouldn’t stand proud. In order to prevent ‘Newtons Ring’ interference patterns I spaced the sandwich by cutting 4 tiny fragments of the sticky part of ‘Post It’ notes (~1mm x 0.5mm) to space them, putting HM in first, then with fine forceps putting the spacers glue side down at four places around the periphery, choosing the frame corner positions in case they ended up protruding slightly, then lowered the UV filter onto it and glued around the edge. Did it that way round not trying to stick the spacers to the UV filter as latter’s coating reduced the ability to stick. Other than the fiddly positioning of the spacers, the tricky thing was keeping the inner two glass surfaces dust-free, involving working in a clean area, cleaning the two filter surfaces beforehand and covering each until picking up to use.

I also wanted to enable use of the polariser, which is by far the best I have ever used being rotatable by a fingertip while holding the camera normally, so I didn’t want to go back to a front-mounting polariser. I therefore wanted to sandwich a hot mirror filter in the same holder. Having studied the polar holder the only way I could see to do that would be to fix to the rear of the polariser glass, but the available space was less than 46mm. Using markers on the polariser and test photos I assessed that 43mm provided sufficient coverage, so I also bought a 46mm Hot Mirror, the glass of which is 43mm. That I positioned on top of the polariser glass, with post-it spacers in the frame corner positions, and filled the approx 1mm gap around it with the adhesive taking care to keep the filter centralised.

Prior to doing the polariser I had measured its light transmission and found it does cut off, though not quite the same as the Hoya, so colour balance although close is very slightly different from the HM- UV filter sandwich, but in the context of using the polariser it is imperceptible unless images are put side by side.

*Note added Jan 2021: Another manufacturer is now offering ready-made filters in Canon R drop-in holders, at a very reasonable price. See my post dated 6th Jan 2021. I have left this post partly for interest, and partly because of my description of adding a UV filter to the hot mirror filter, to more closely match the camera’s original colour sensitivity prior to its full-spectrum conversion.

One thing I omitted to say is that being a mirrorless camera, with an electronic viewfinder (though in practical terms seeming like the viewfinder of an SLR), you can see images as they will appear as set by the camera’s white balance. So even with the 850nm, with effectively no visible light reaching the sensor, you can see and compose the image, and focus manually if you want: if AWB is set it will be monochrome red (because there is no light other than red, infrared being ‘seen’ as red), or if custom WB set appropriately it will appear B&W (or of course can set camera to B&W).

@CarSpy, how did you get on with your conversion?