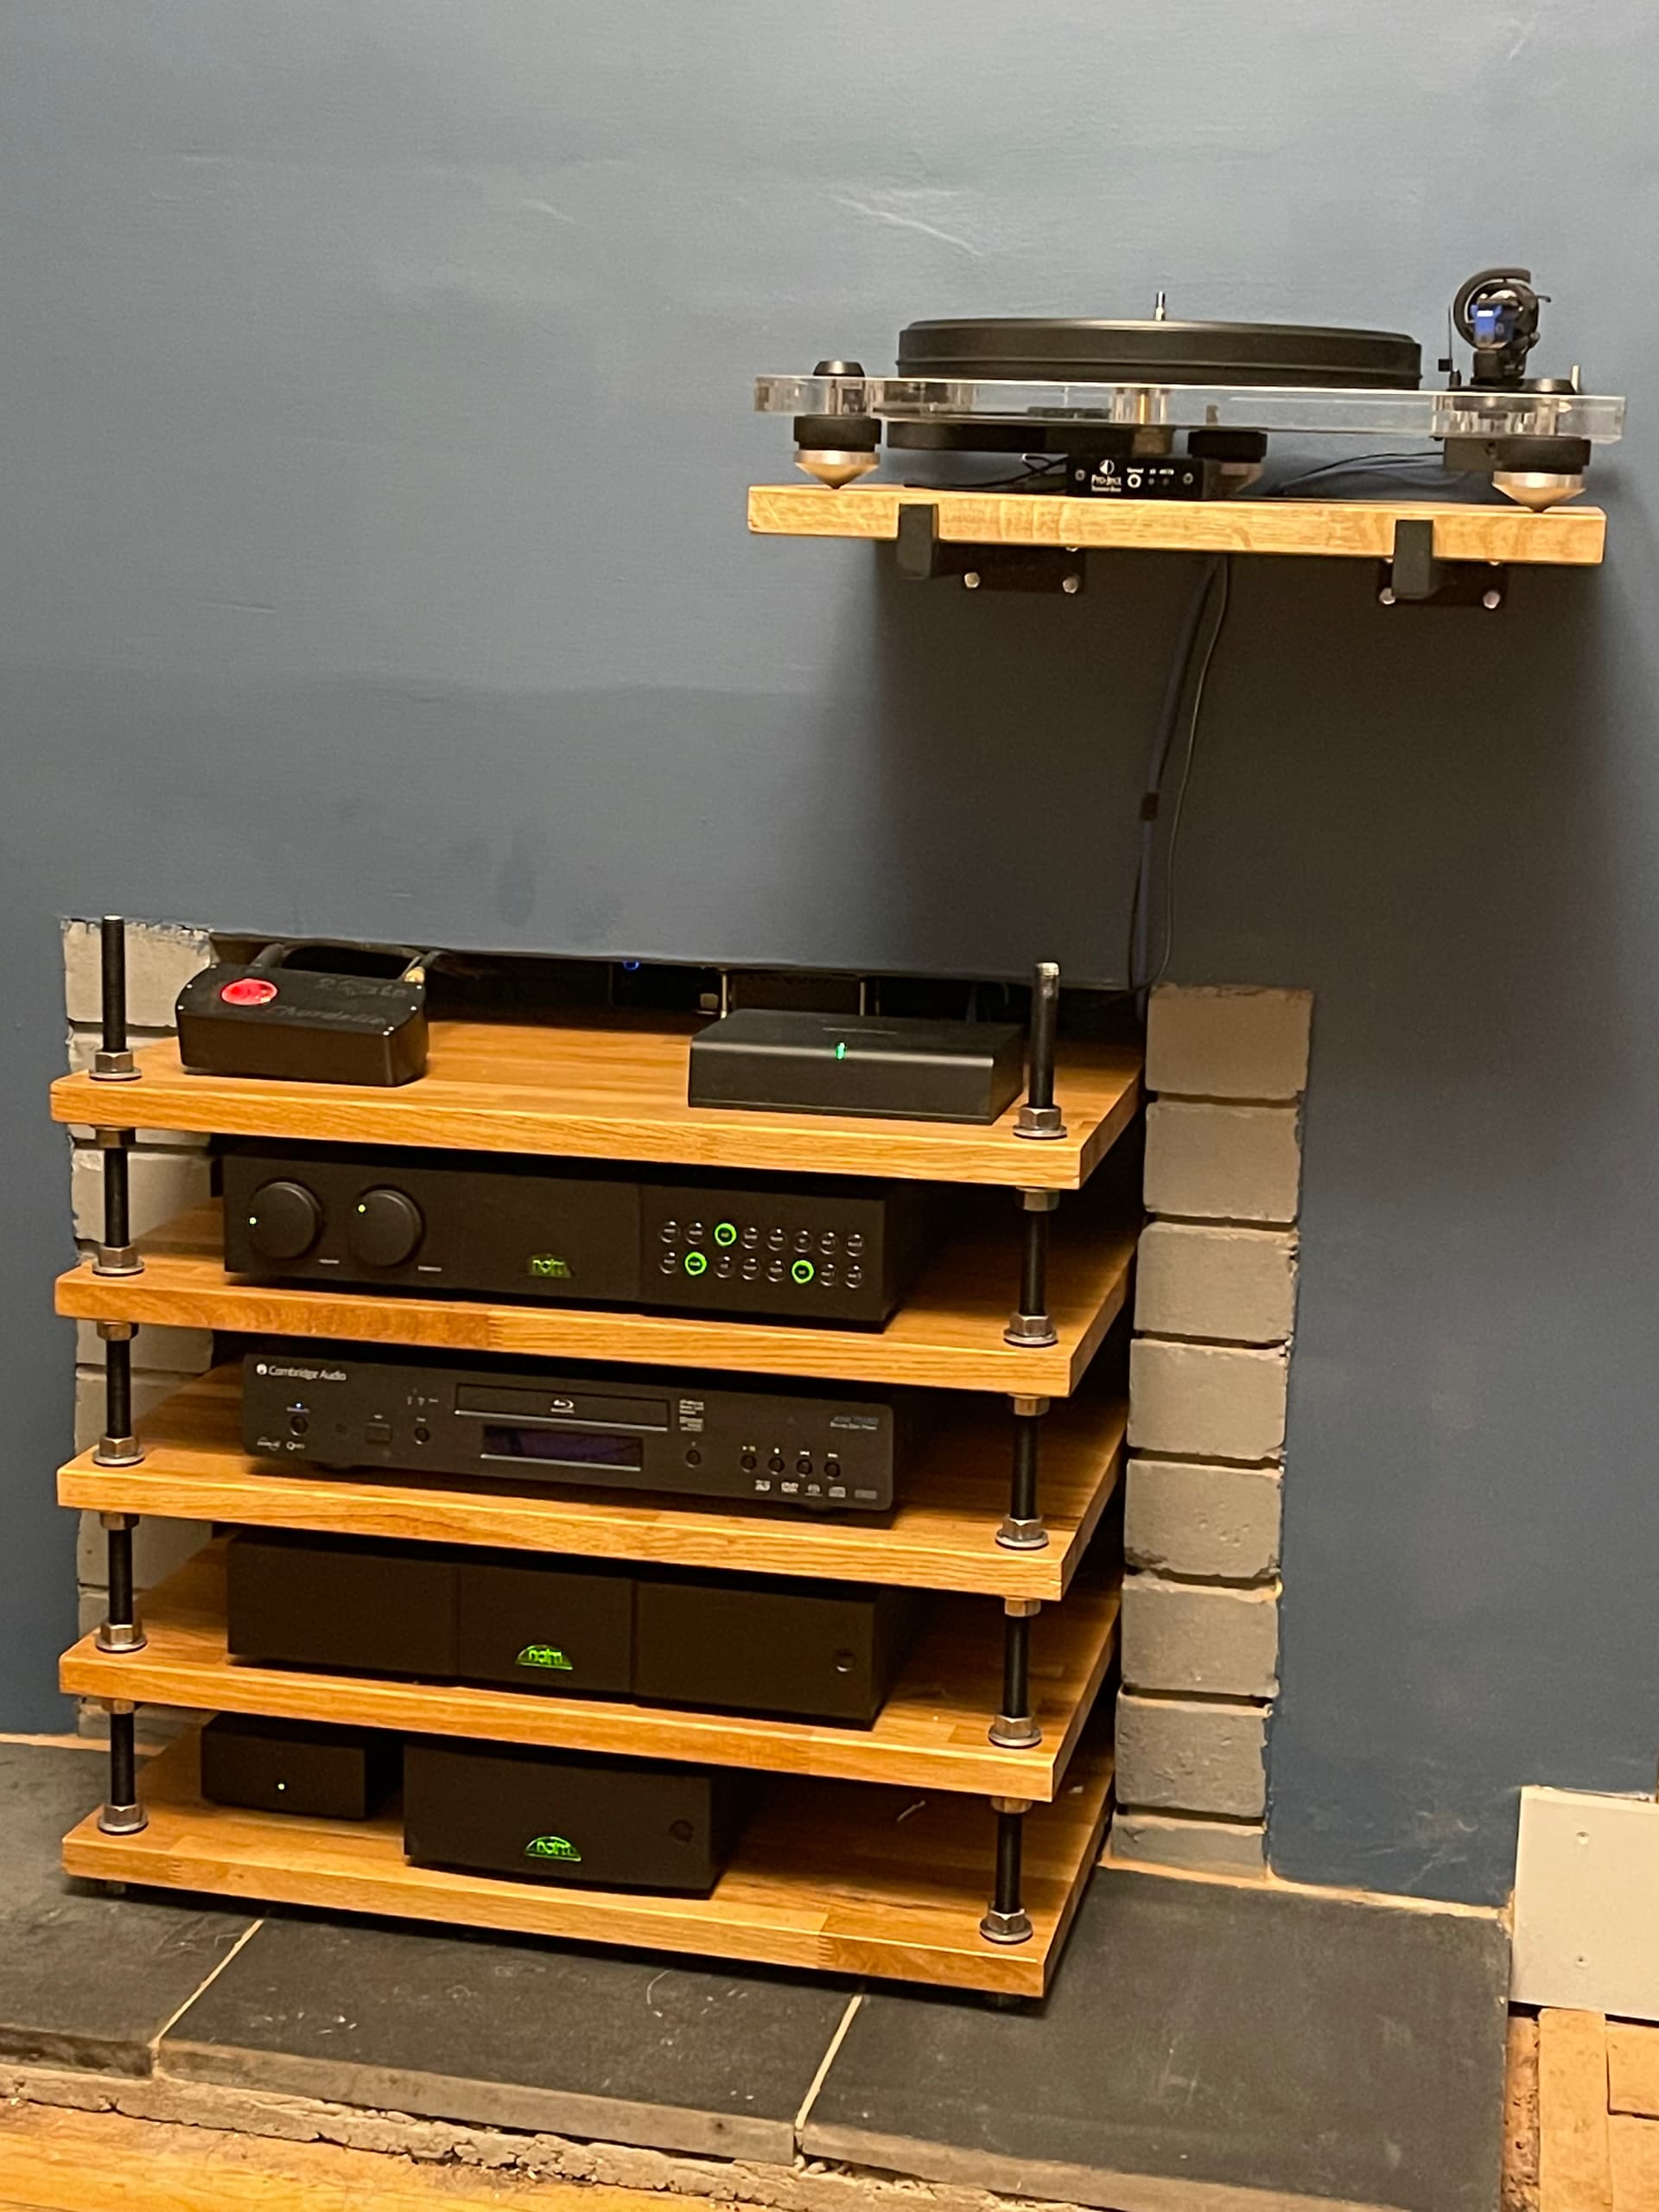
Well as I couldn’t afford a fraim I asked for DIY ideas and settled on a tnt flex. It’s three Ross, the back one is in the middle, I got 3 x 180x62cm wood from b&q got them to cut the rack shelves out and leave a 20cm x1.8m strip from each of the three pieces, £240 for the pad including all the shelves the turntable shelf, and have another isolation platforms spare along with another shelf.
£60-
Cheers, never going to use the fireplace as a fire so drilled three holes through the back into the under stairs cupboard and all the cables go through these.
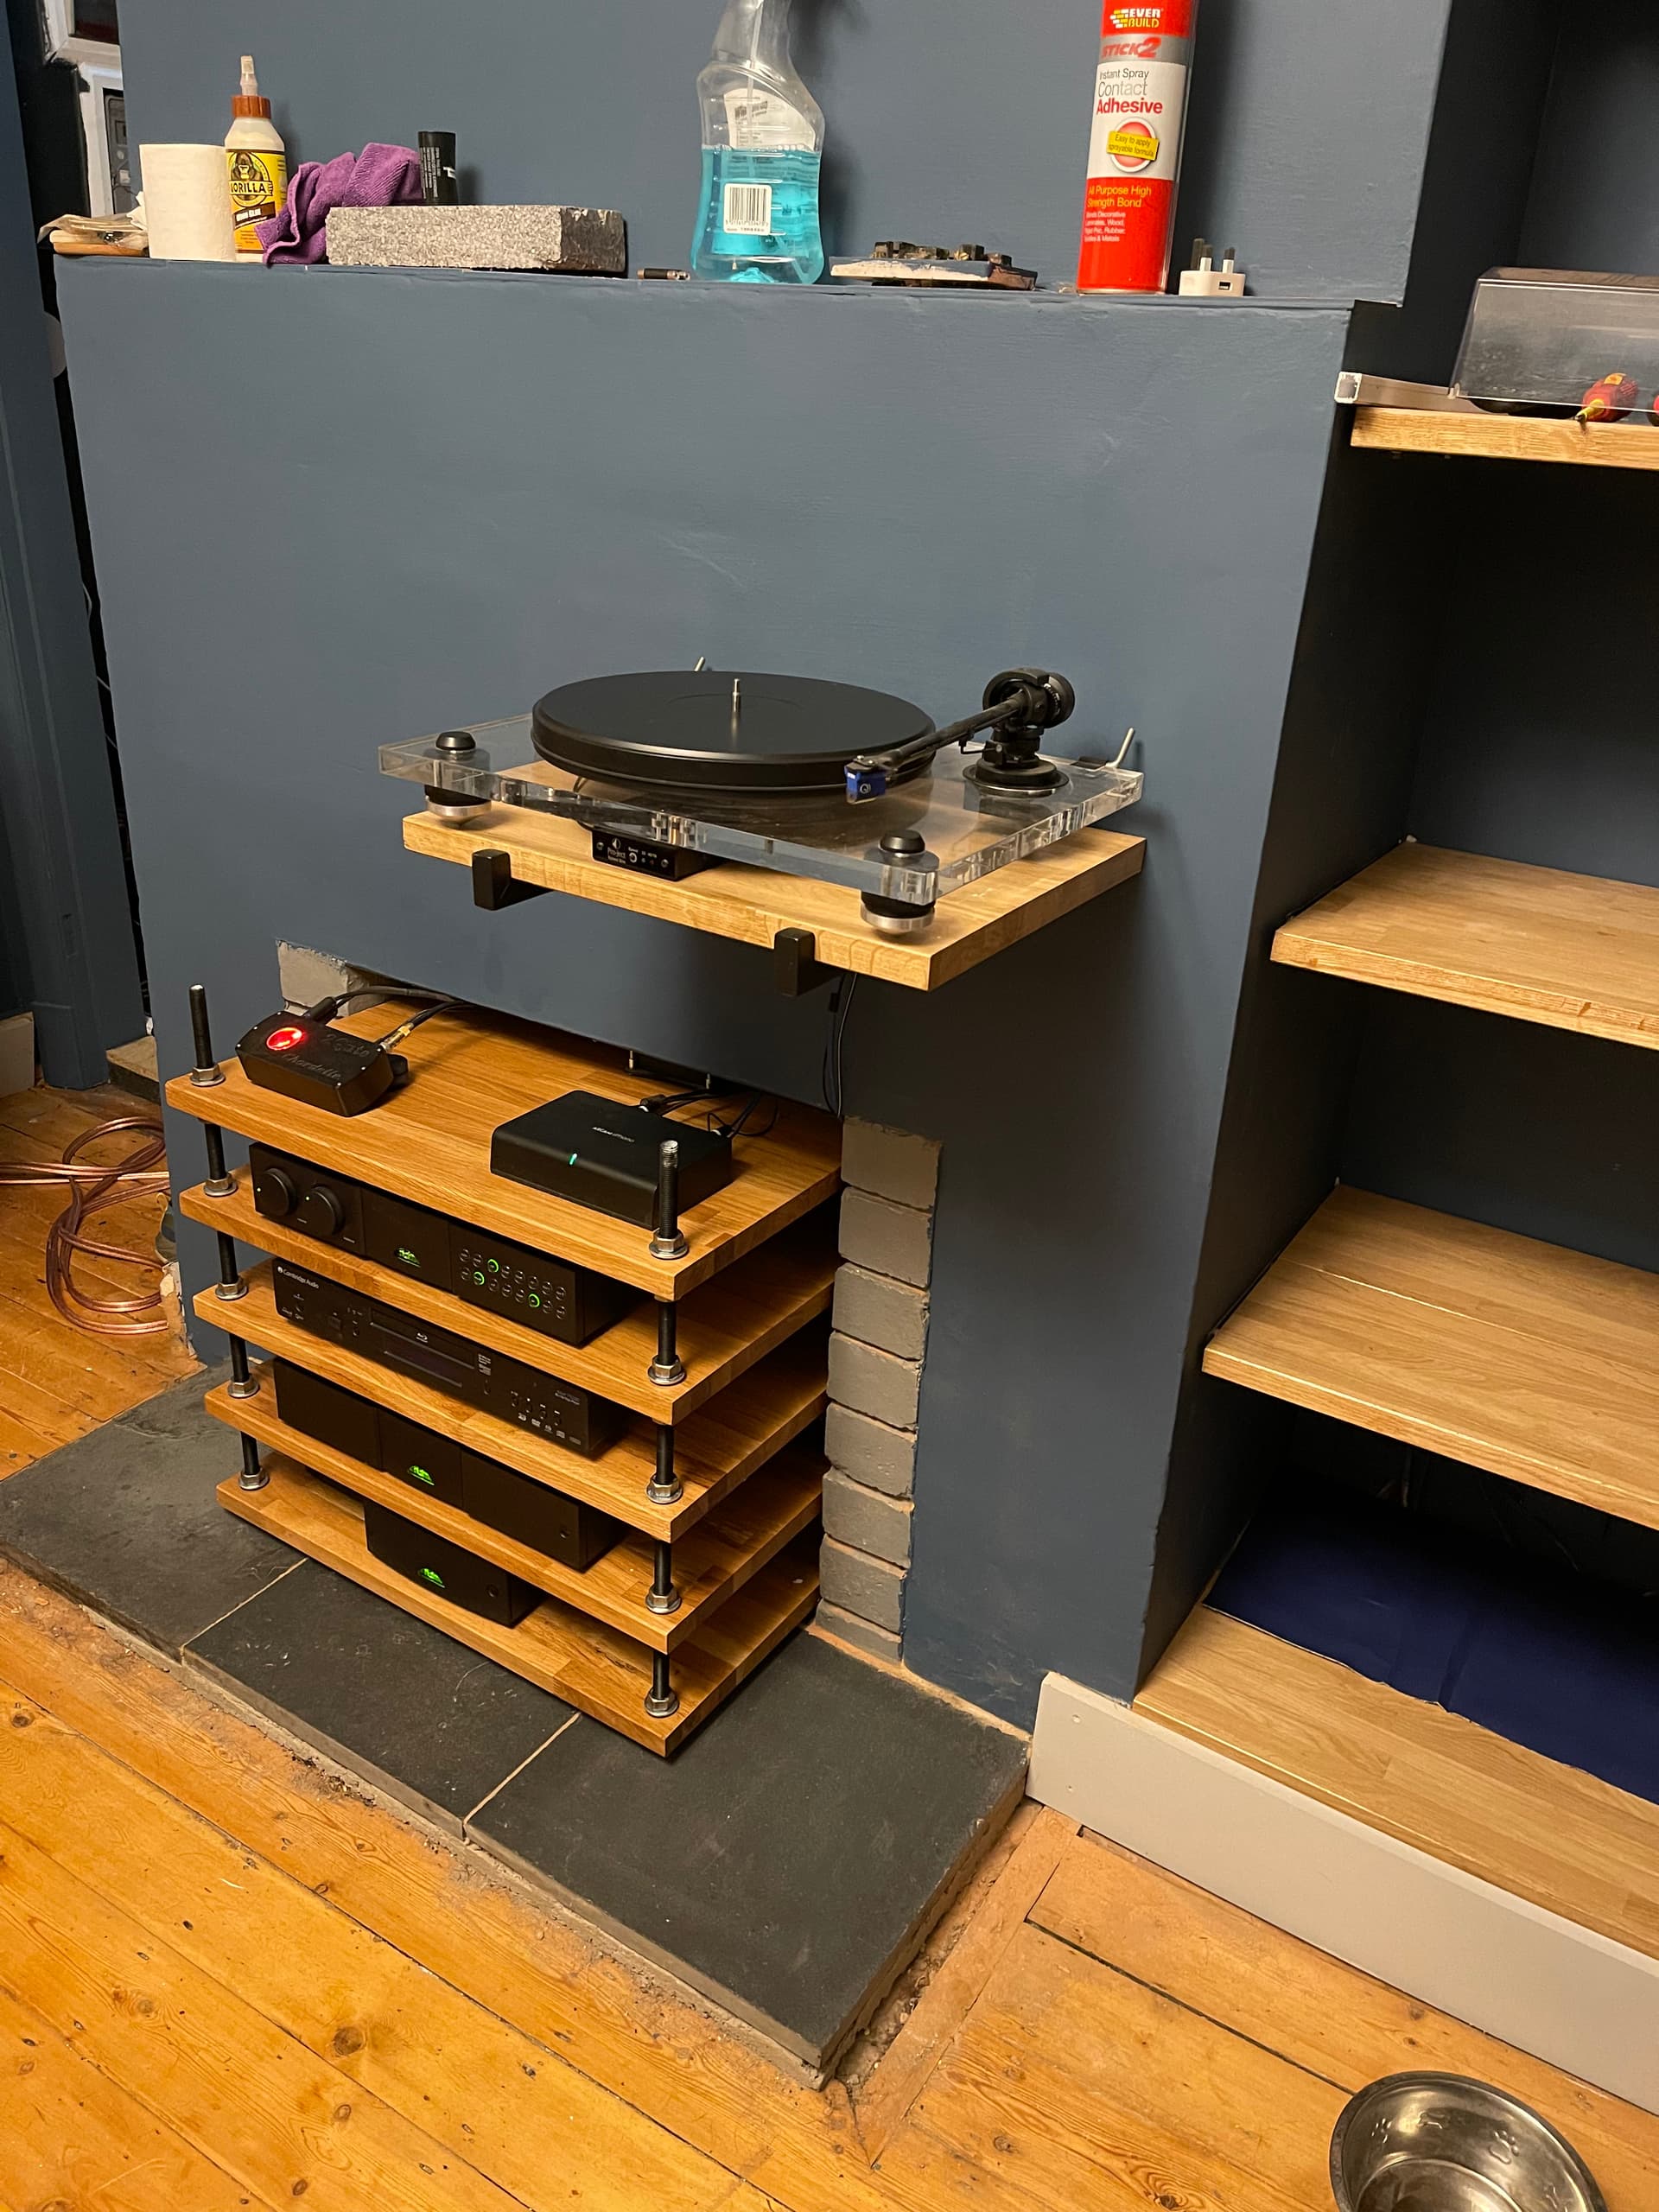
Very impressive that you can make things like that, as I’m hopeless. One thing would bother me about it though - the two legs sticking up at the front. Would it not be possible to cut them down or have some other cap on the top thread? They look like an accident waiting to happen and make the rack look unfinished.
Each shelf is just connected via rubber washers then metal washers, it sounds fine so far. The only really sensitive thing is the truth and I’ve put that separate.
As you say it’s not a fraim. But, I couldn’t afford one
Looks great and good use of space.
The B+Q wood - was that from a kitchen counter top?
I did consider using it myself but found if cut too small it lost it’s strength at the bonds between pieces - yours looks solid enough so should be ok.
I used B+Q square oak bannister spindles for mine - first time i’ve tried linking so hopefully this goes there.
Lovely work @booktrunk ! Having made my own DIY rack I do know how much time and effort is required to do something like this. Very creative use of space and materials too, but agree with the suggestions of trimming the front threaded rods, and perhaps finish with rounded bolts to hide the top of the threads?
This approach of using the combination of threaded rods, nuts and rubber washers to build a homemade rack is a well thought out solution, and affords great flexibility for changing the shelf height, but doesn’t seems to be as widely used in the UK for some reason.
Just as an aside, why did you offset the turntable support? I’m assuming due to the risk of over drilling the holes for the fixings into the chimney cavity etc.
Bizarrely it’s not on their website, but it seems to be classed as for bathroom or Similar use, found them
in store £78 for 1.8m x .62m x 26mm thick, and three of these was just what I needed. Got all the cuts I wanted them to do for free.